How I Convert a Colour Image into Black & White: 3 Quick Techniques (Lightroom Classic and Photoshop) - A Portrait Example
I love black and white photography. But what I love more is to be outside making images rather than sitting behind the computer. So I developed three techniques to speed up my b/w conversion workflow.
The smell of darkroom chemicals as I developed rolls of Ilford FP4 (portraits) and HP5 Plus (action / street) many years ago pre-digital are still lodged in my brain.
Things were simpler then.
Load a roll of b/w film, go out and shoot, develop the roll, make prints in the darkroom (with small adjustments eg. dodge and burn).
Done.
Repeat.
Now we have the digital darkroom: computers, multiple software programs (with subscriptions), plugins for said programs, sharpening workflows, luminosity masks, etc.
It can be complicated.
So to streamline my workflow, I have three go to (and fast) techniques for converting a colour image into black and white. This means I spend less time in front of the computer, plus I can get back out making images asap.
It consists of only editing in Adobe Lightroom Classic (LRC), with only one workflow requiring a single roundtrip to Adobe Photoshop (PS).
Overview of my workflow:
Make the initial colour edit in LRC, then either:
Convert to B/W via LRC Colour Channel Desaturation, or
Convert to B/W via LRC Treatment Profiles, or
Convert to B/W in PS via Gradient Map (via LRC)
Hopefully you find them helpful.
For this illustration I’ll edit a portrait / lifestyle image. I was planning on doing a landscape image too, but the post was getting a bit long - so I’ll save that for next week.
Let’s go!
The Workflow
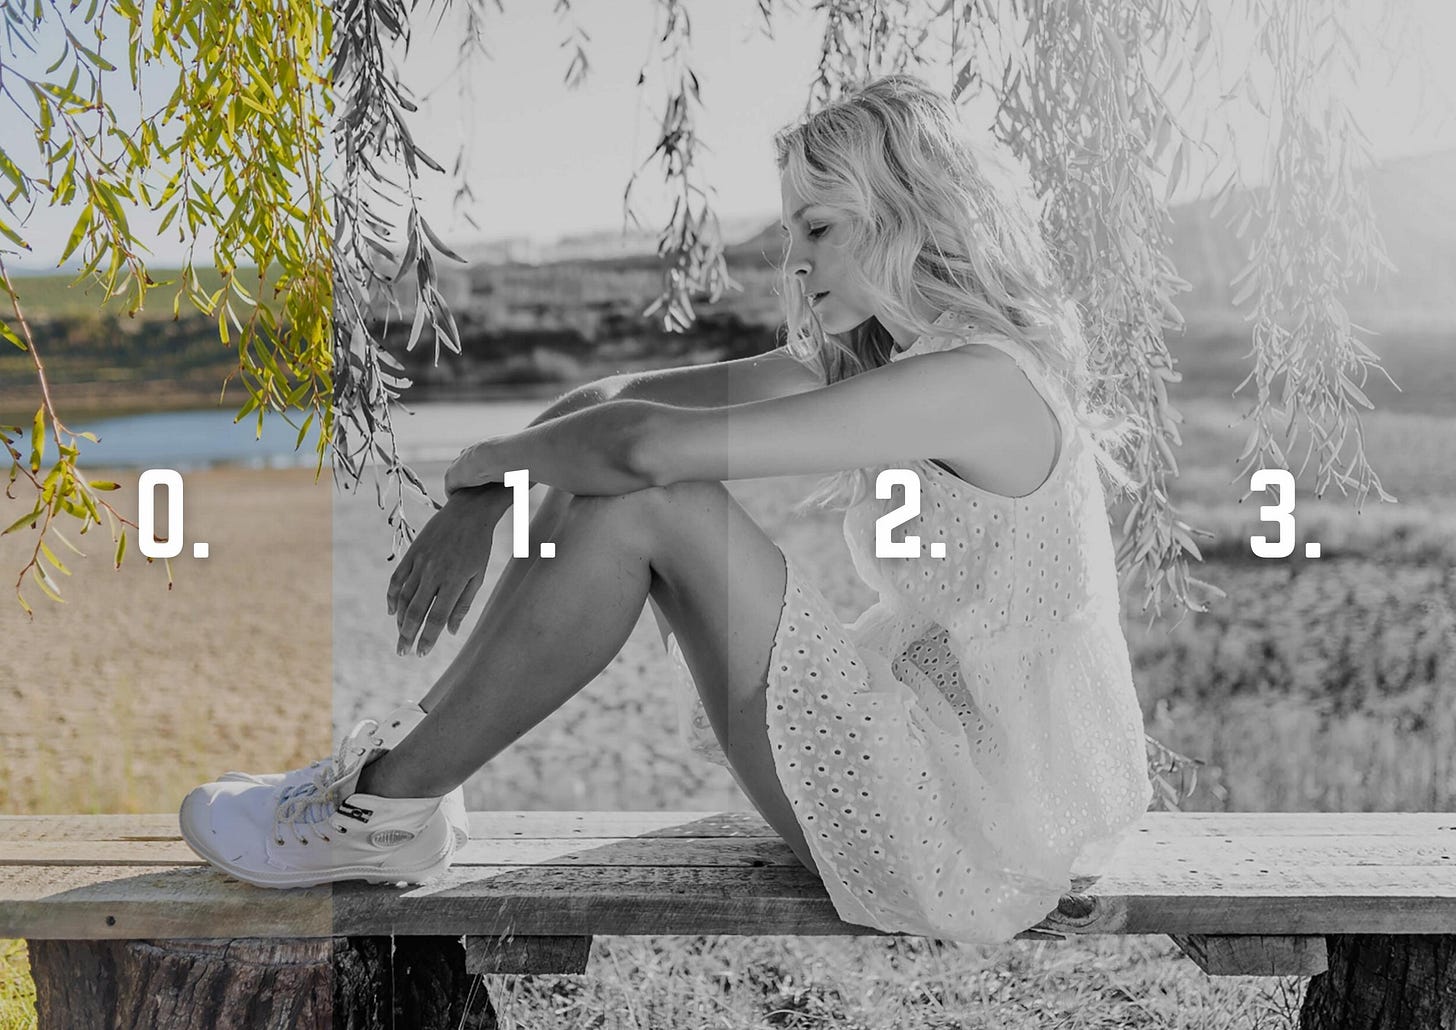
0. Colour Edit:
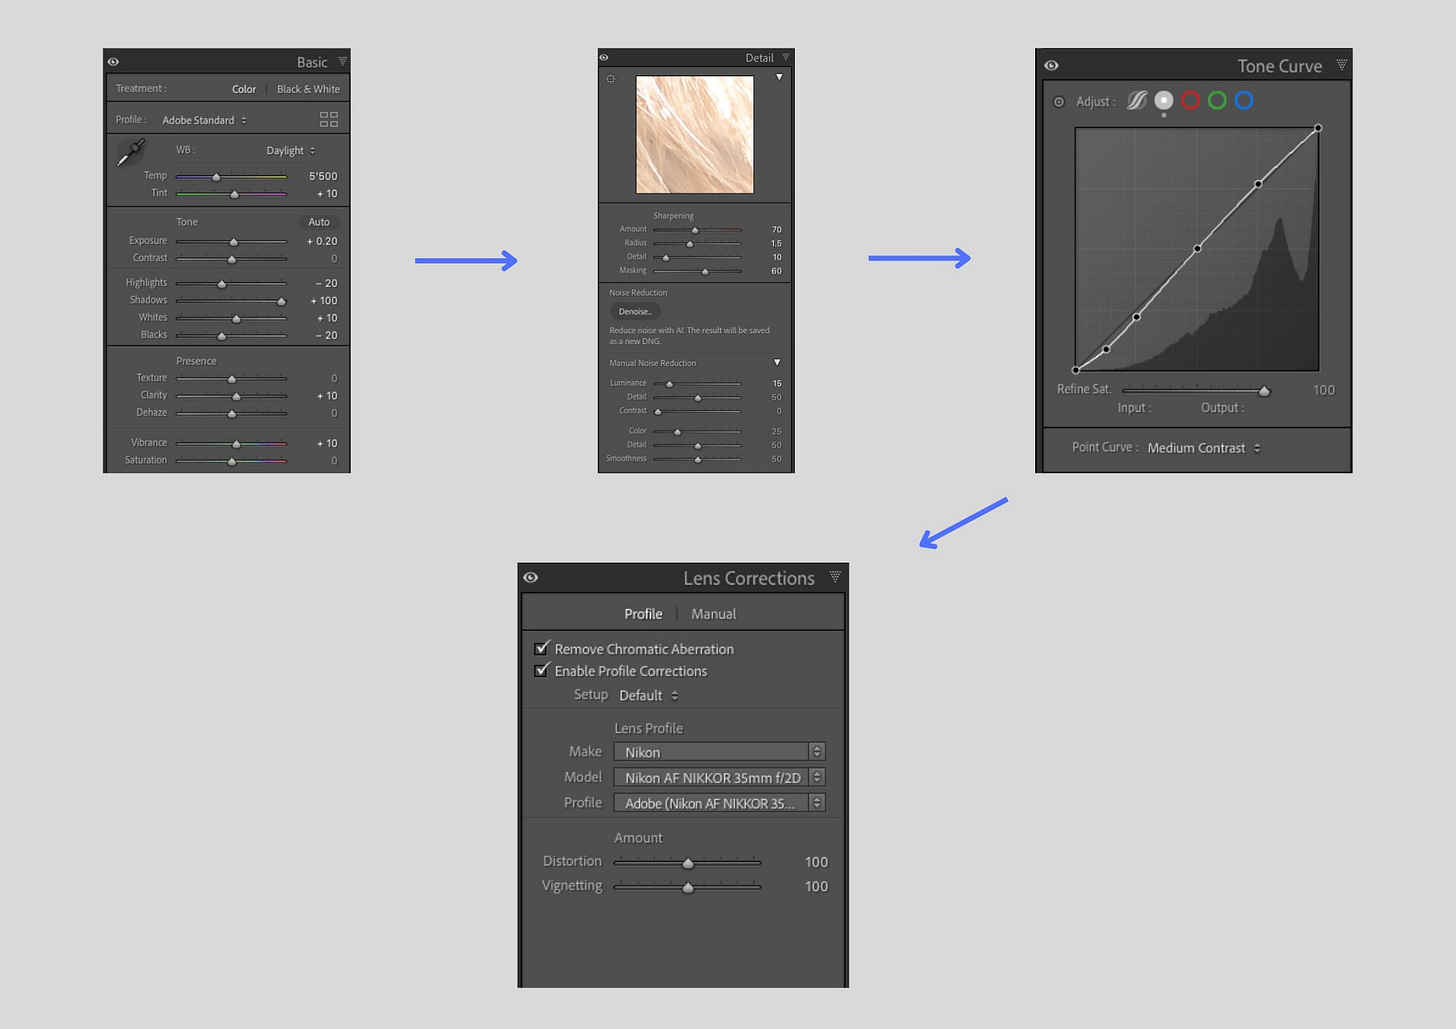
What I do first is edit my initial colour image to where I would like it to be.
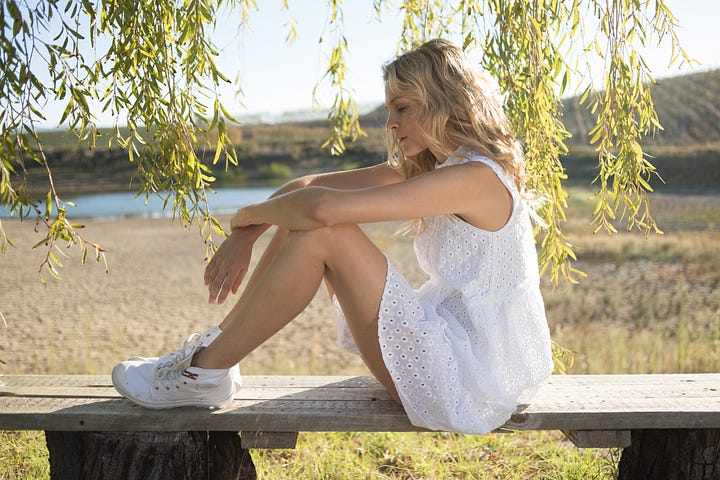

Below you can see the edits made in LRC to get the image above to where I’m ready to convert it to black and white.
Then it’s time for the b/w conversion magic.
1. B/W Conversion in LRC via Colour Desaturate:
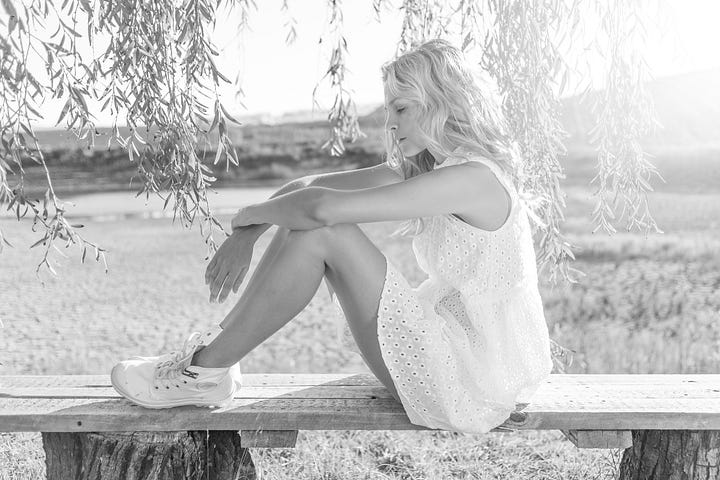
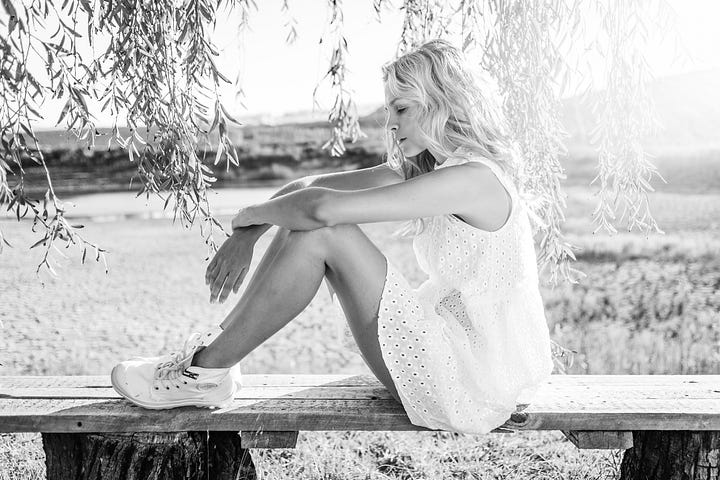
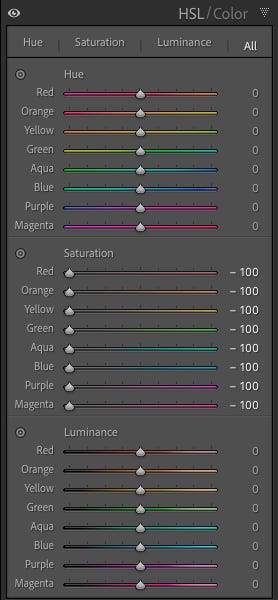
The first technique involves desaturating the image via the HSL / Colour Panel (and each individual colour channel).
The result is a flat b/w image.
Which is what we want, as it’s a good starting point to add contrast (and we can decide where and how much).
All I do then is simply add some contrast, clarity, tweak the tone curve slightly and lastly, I add a slight vignette (see below).
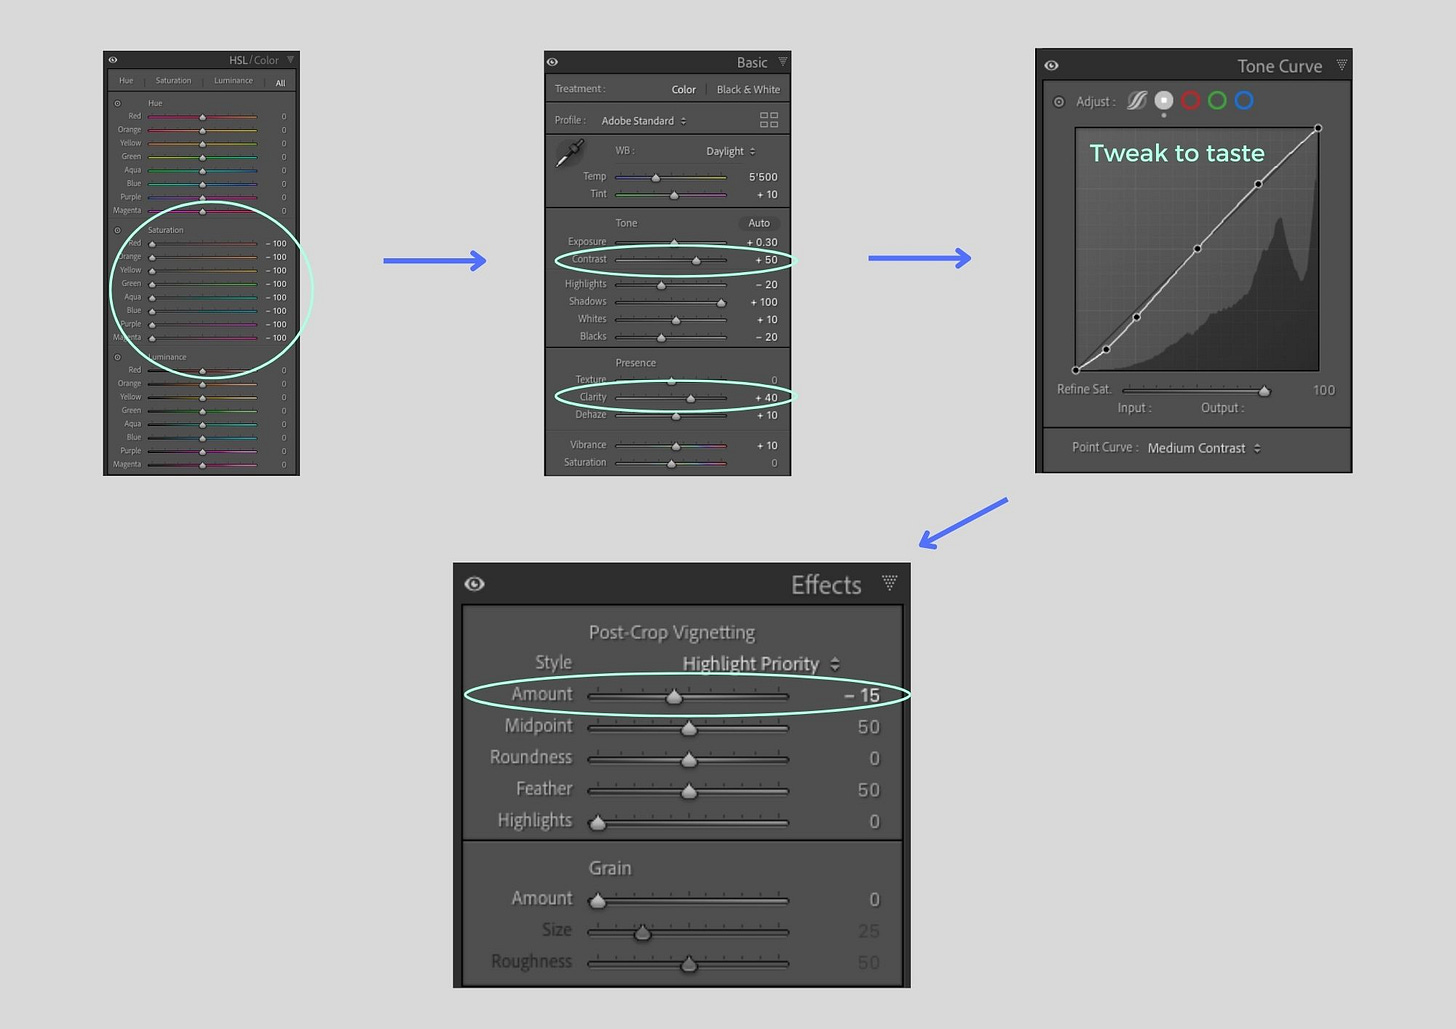
Done!
Total time (after initial colour edit)?
Maybe 2 minutes (or less).
Tip: you can save the desaturation of the colour channels as a preset, which will speed up the process even more.
2. B/W Conversion in LRC via Treatment Profiles:
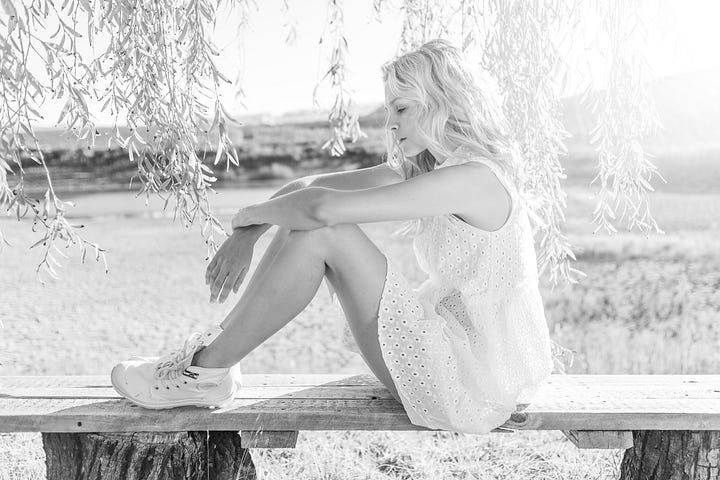
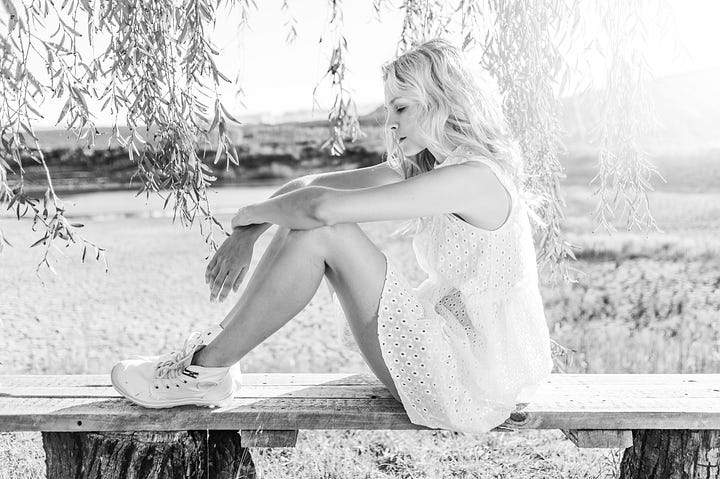
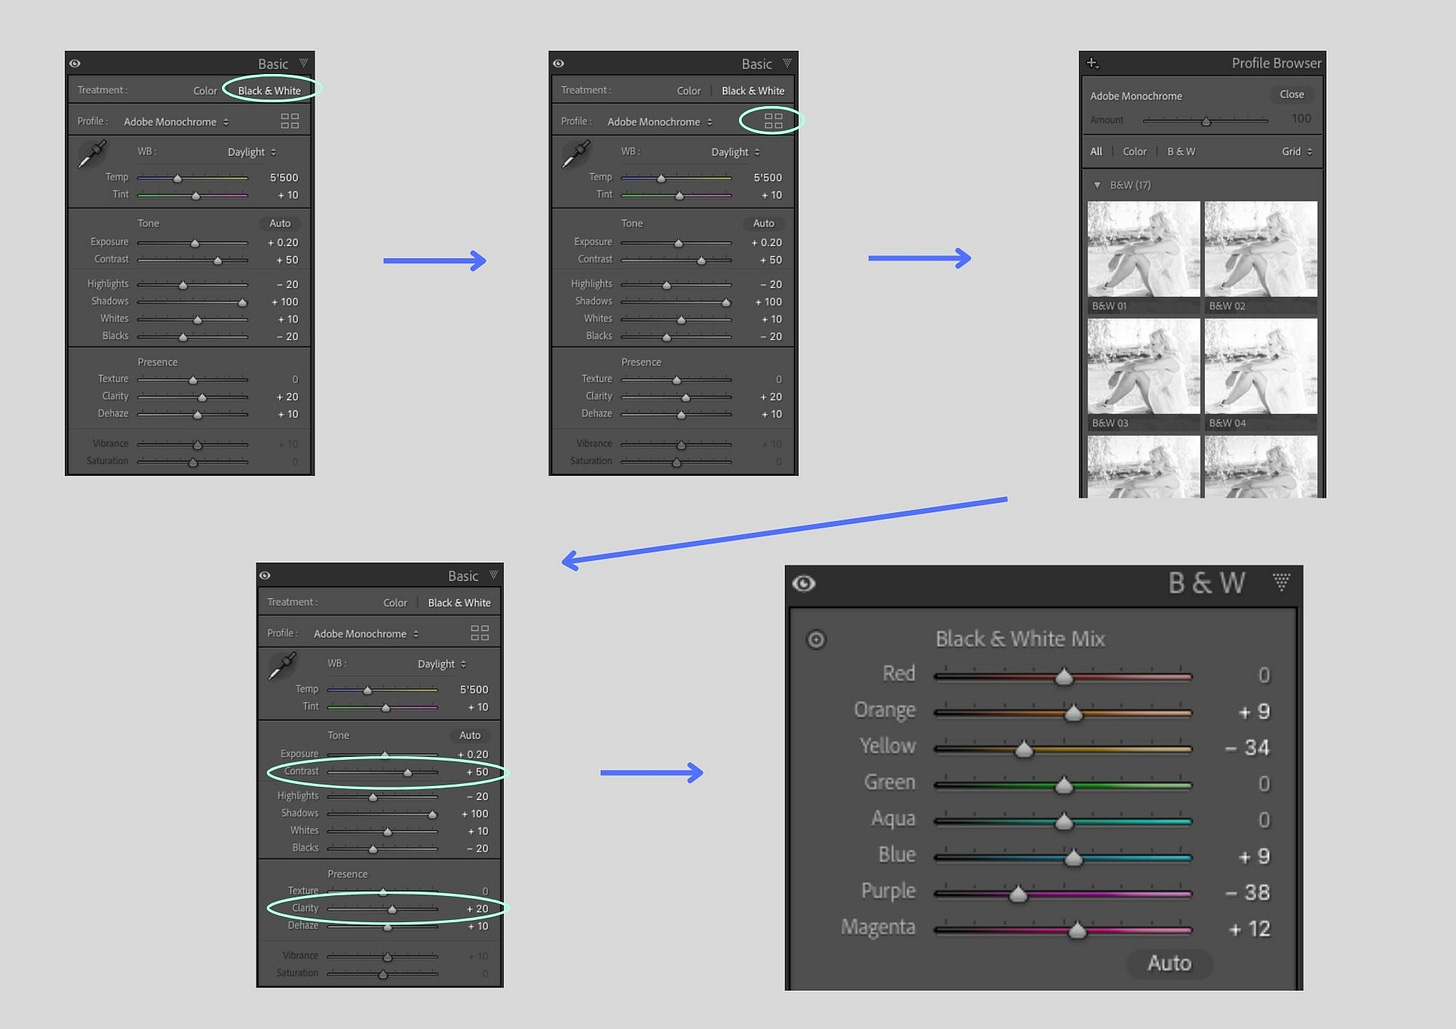
This technique involves desaturating the image by selecting the Black & White treatment profile in the Basic Panel when in the Develop Module.
This again results in a flat b/w image (not quite as much as in technique 01).
An advantage of this method is we can now select one of the built in b/w profile presets for a “click and done” solution.
These can be a bit hit and miss, so experiment with them (you can also adjust the intensity via the “Amount” slider).

In this case I won’t use a profile preset.
Instead I quickly add some contrast and clarity, then tweak the colour channels under the (only visible when using the B/W Treatment Profile) B&W Panel in the Develop Module to create contrast as needed (see all steps below).
Done!
Total time (after initial colour edit)?
Maybe 2-3 minutes (quicker once you’re familiar with the steps).
Tip: don’t overthink it, go with your gut on what looks good.
3. B/W Conversion in Photoshop via a Gradient Map:

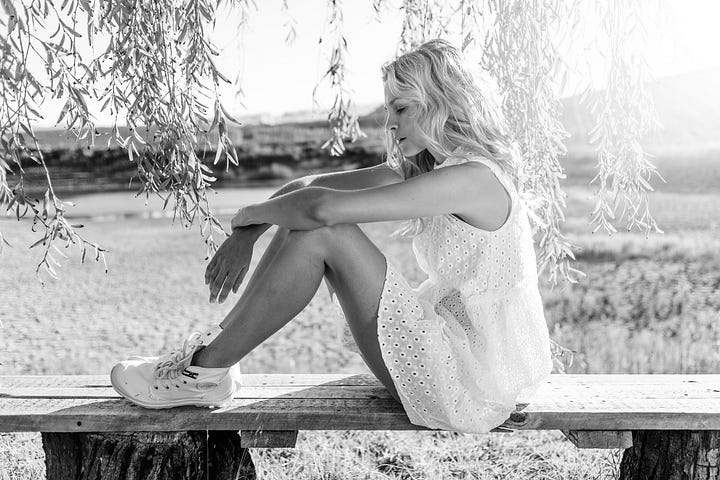
This technique is a bit more involved, but it is more flexible if you want to have finer control over the edit (e.g. layer blend modes, opacity, etc.).
So let’s open the image in Photoshop.
Right click on the image in Lightroom > “Edit in Adobe Photoshop”.
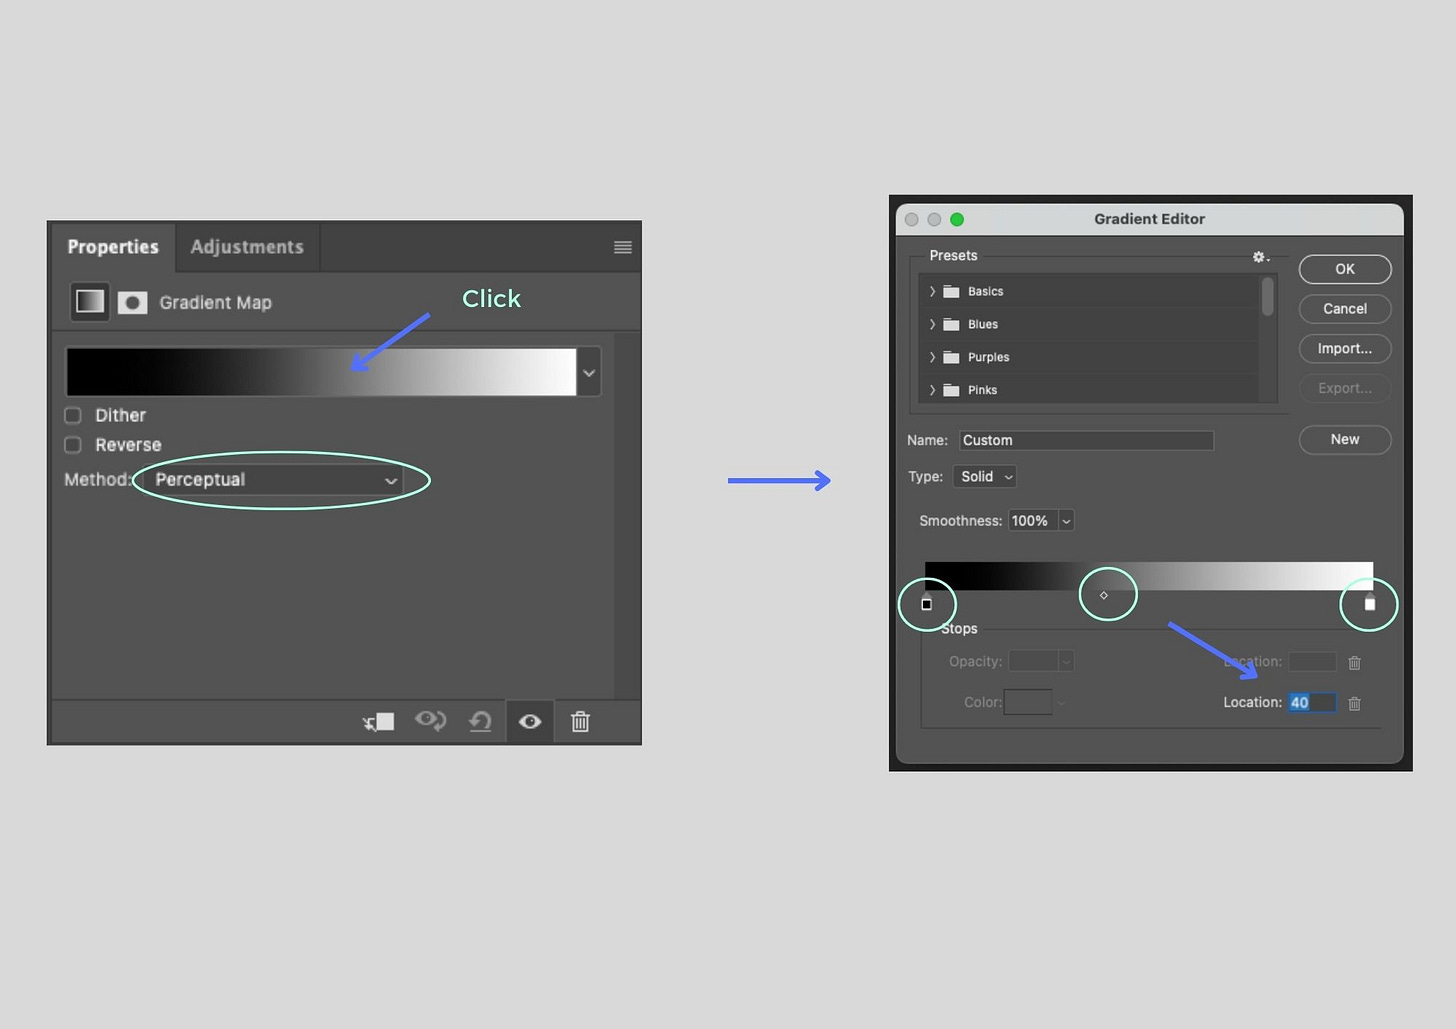
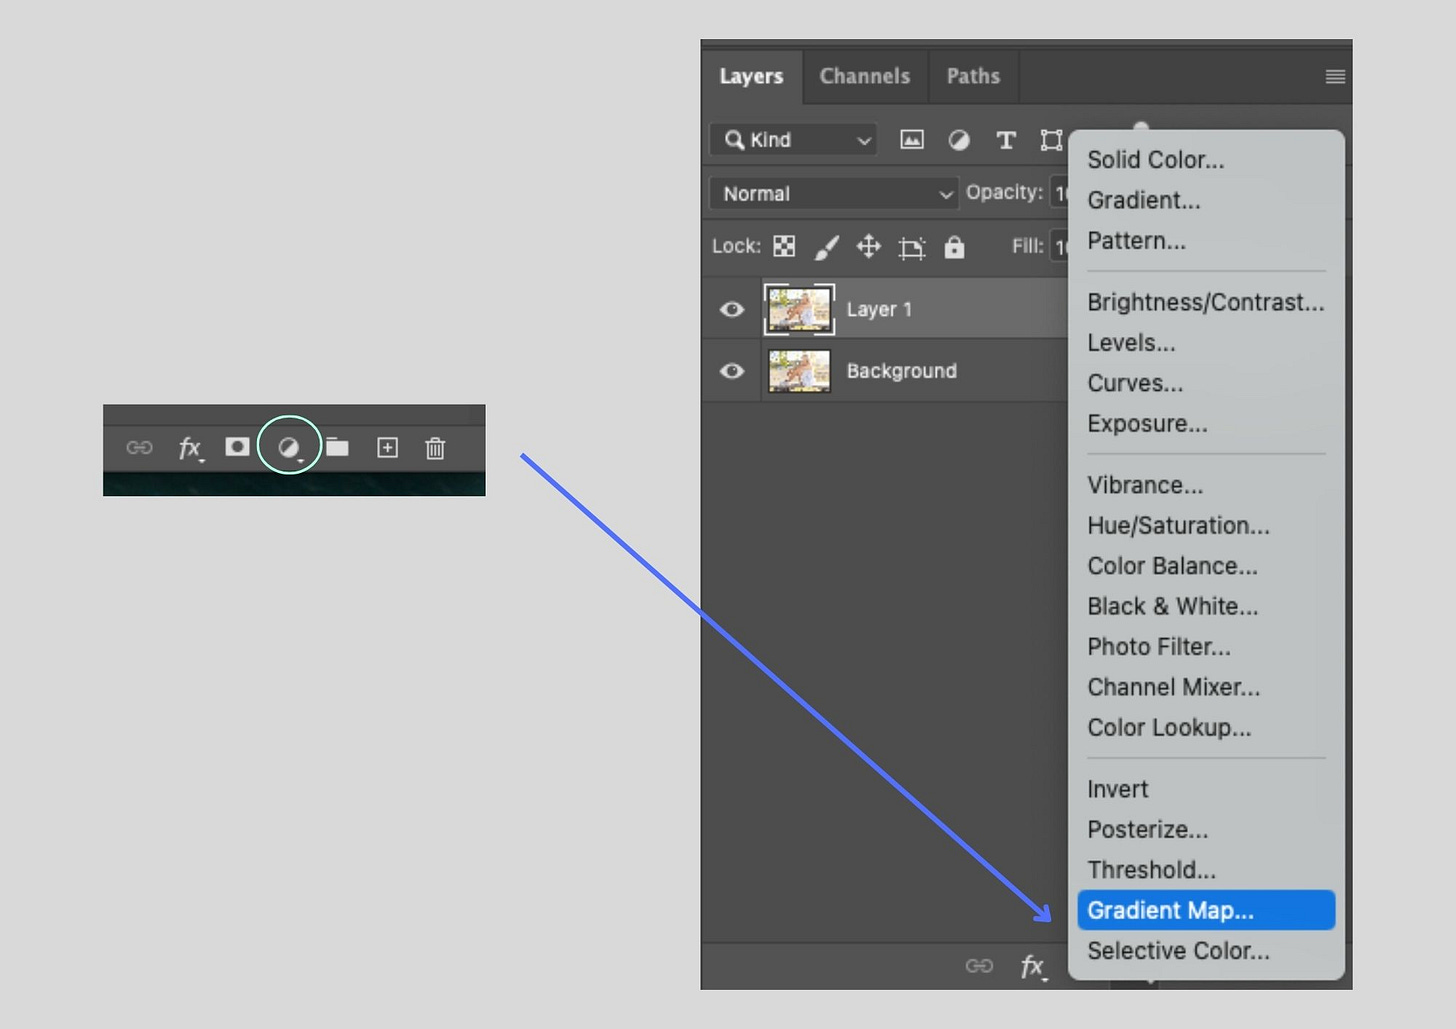
Once the image is open in PS, you can duplicate the background layer like I have, but it’s not essential. Then, on the bottom right, click on the little circle that’s divided in half, then select Gradient Map (see below).
This immediately gives a punchy b/w image (versus the previous 2 techniques).
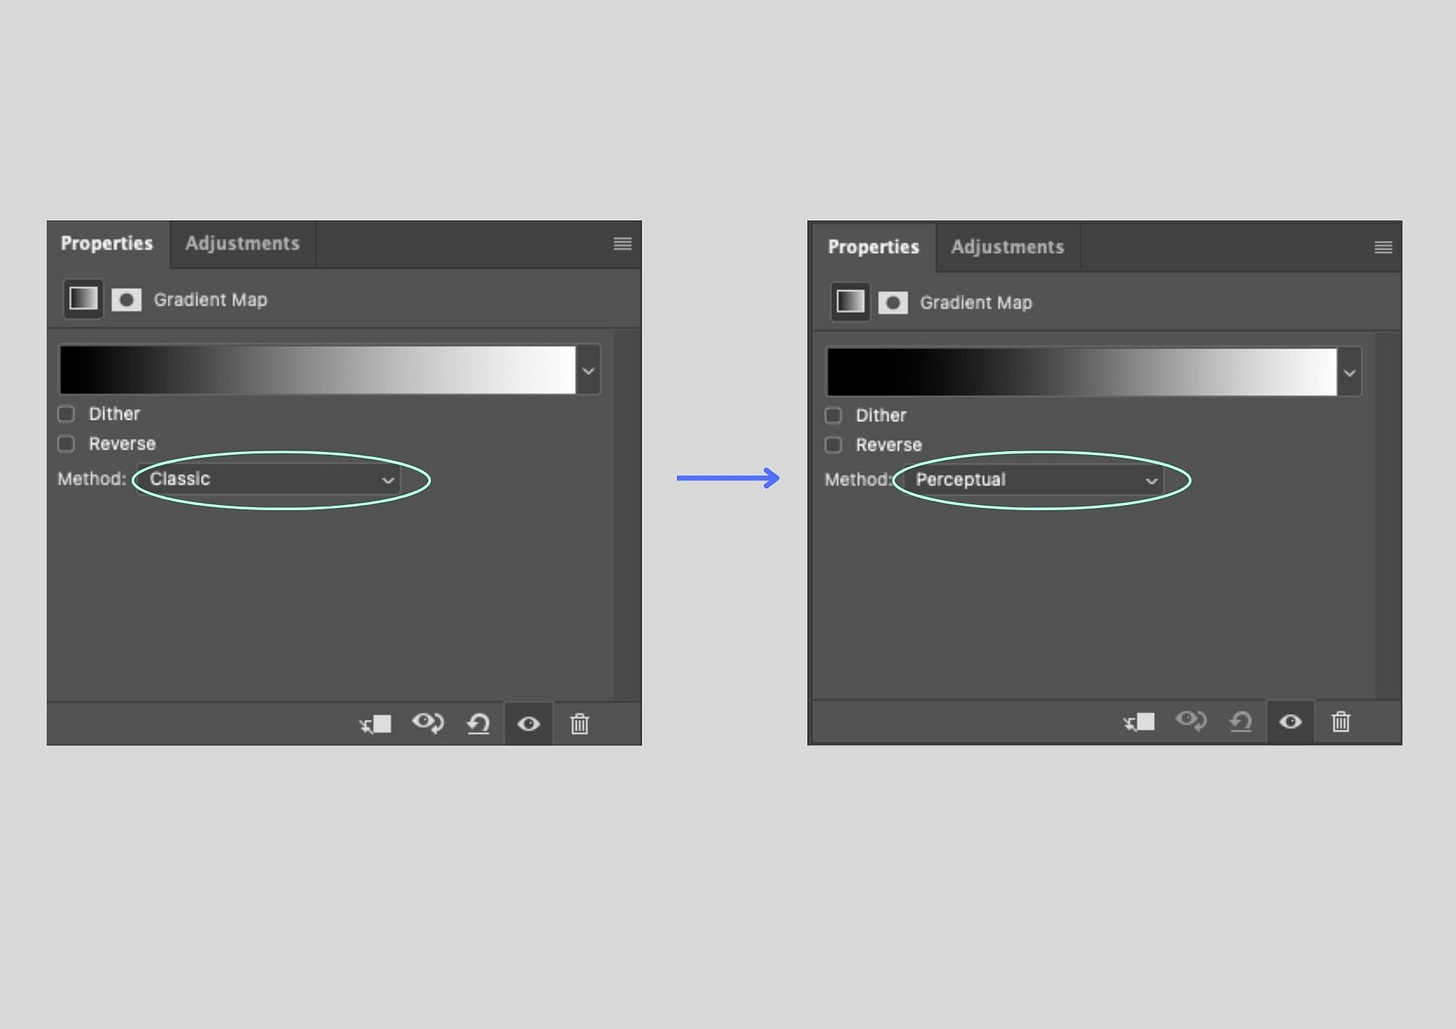
But we can click into the gradient map layer and select “Classic” (less contrasty) or “Perceptual” (more contrasty) Methods.
One step further, we can click on the b/w gradient bar in the image above to bring up the Gradient Editor.
And then adjust the black (left), midtone (middle) and white (right) points.
This will take some tweaking to get right.
In this case I only lowered the midtone (dot in the middle) value from 50 to 40 to get a tad less contrast (see below).
Now all we need to do is save it, then return back to Lightroom.
Here we can make some final adjustments if needed, e.g. add a vignette (not in this case).
Done!
Total time (after initial colour edit)?
Maybe 3-5 minutes (quicker once you’re familiar with the technique).
Tip: once back in LRC, you can play around with additional contrast / black point adjustments in the Tone Curve Panel.
Closing Thoughts
That’s it for all three techniques.
Quick, simple and easy to implement.
Can they be more detailed and complicated?
Sure.
They are not perfect.
But they get the job done for me - quickly - in 99% of cases.
Can I spend dozens of hours scrutinising every minute detail of each image, eyes going square from the screen time, until they are (supposedly) perfect?
Of course.
But where’s the fun in that :)?
Any thoughts / comments?
Do you have any quick and dirty techniques that make your editing life easier?
Simply hit reply and let me know / comment below.
PS - Next week I’ll go through a landscape image example, with an additional bonus technique, stay tuned!
—
Until next time ✌🏽.
Cornelius
Last week’s blog / newsletter:
Enjoy this newsletter?
Forward it to a friend 👉🏽 sharing is caring 😊.
Join the Crew?
If you’d like to keep sharing the visual stoke together, sign up for Alpine Dispatches.
Looking for more / to connect?
You can find me on Vero (photography), Instagram (photography, life, family) and Twitter (photography, discussions, thoughts), as well as my website (portfolio, trying to be an adult 🤷🏼♂️).






Fab info!!