A Technique I Use to Save My Panorama Images When Needed (Lightroom Classic & Photoshop)
Going through some images from a while back, I found a panorama sequence that I liked, but didn't quite capture wide enough. Then I recalled a technique I could use in just such an instance.
Panoramic images.
Great to look at, not so easy to capture (every time).
Especially if you’re on a multi day hike in the Drakensberg mountains in South Africa, with a heavy pack, and having to capture a panoramic sequence handheld (while trying to keep up with the group).
Which might be why I didn’t double check to make sure I captured enough frames top and bottom.
And this week, going through the images from that trip, there are some nice frames - if I do say so myself (insert smug face emoji).
However, this specific panoramic sequence didn’t quite merge together as I had hoped.
Note to self:
Get those extra frames (left/right, top/bottom) next time!
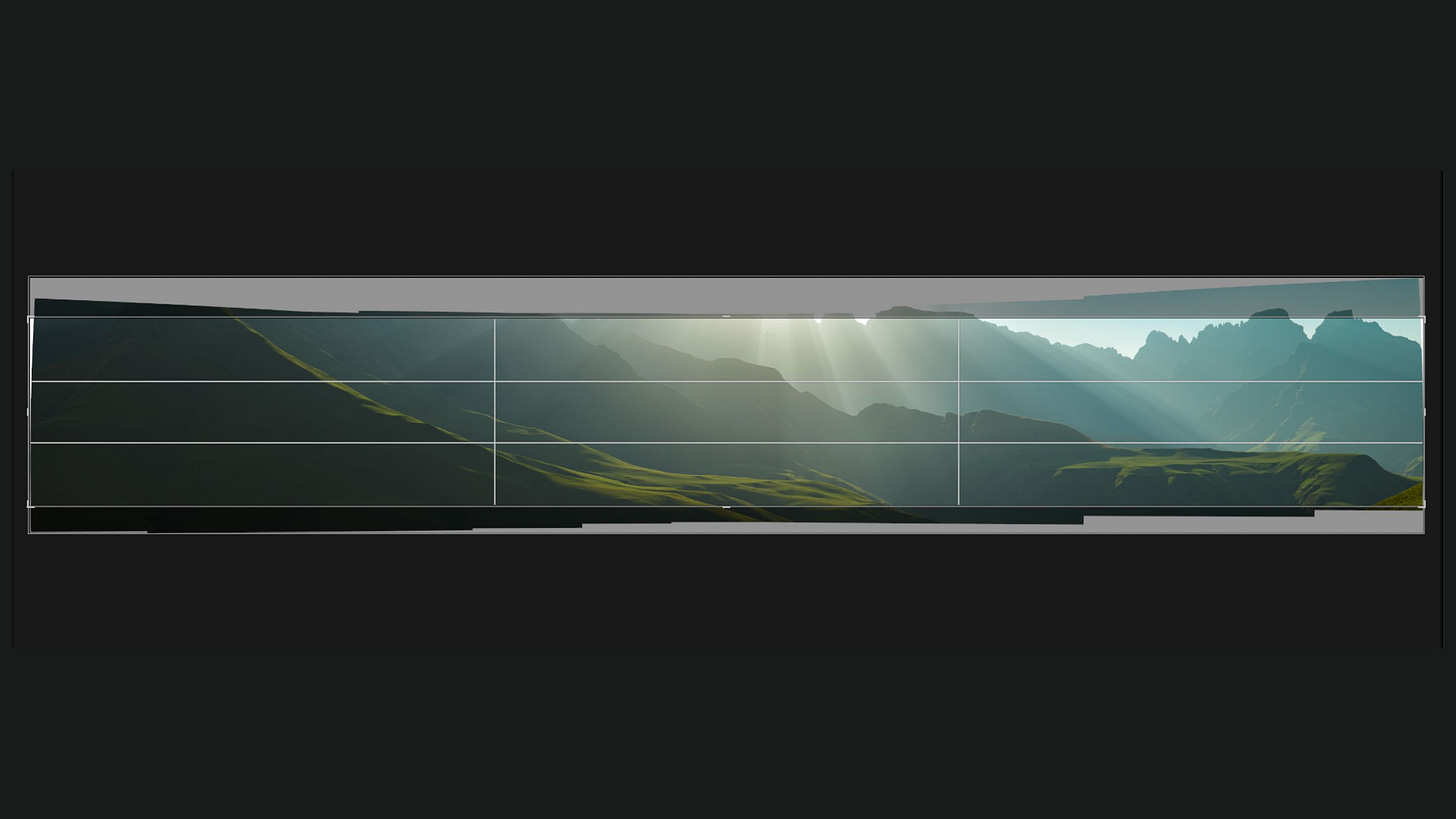
You see, after merging the images together (above image: select images > right click > Photo Merge… > Panorama) in Lightroom Classic, the resultant crop cut into the mountain peaks top right of the image (see image below).
Not ideal, as they form an integral part of what makes the image work.
But there’s hope.
As I was staring at it on my computer screen, I realised there was a way I could salvage the situation.
A technique I picked up a few years back.
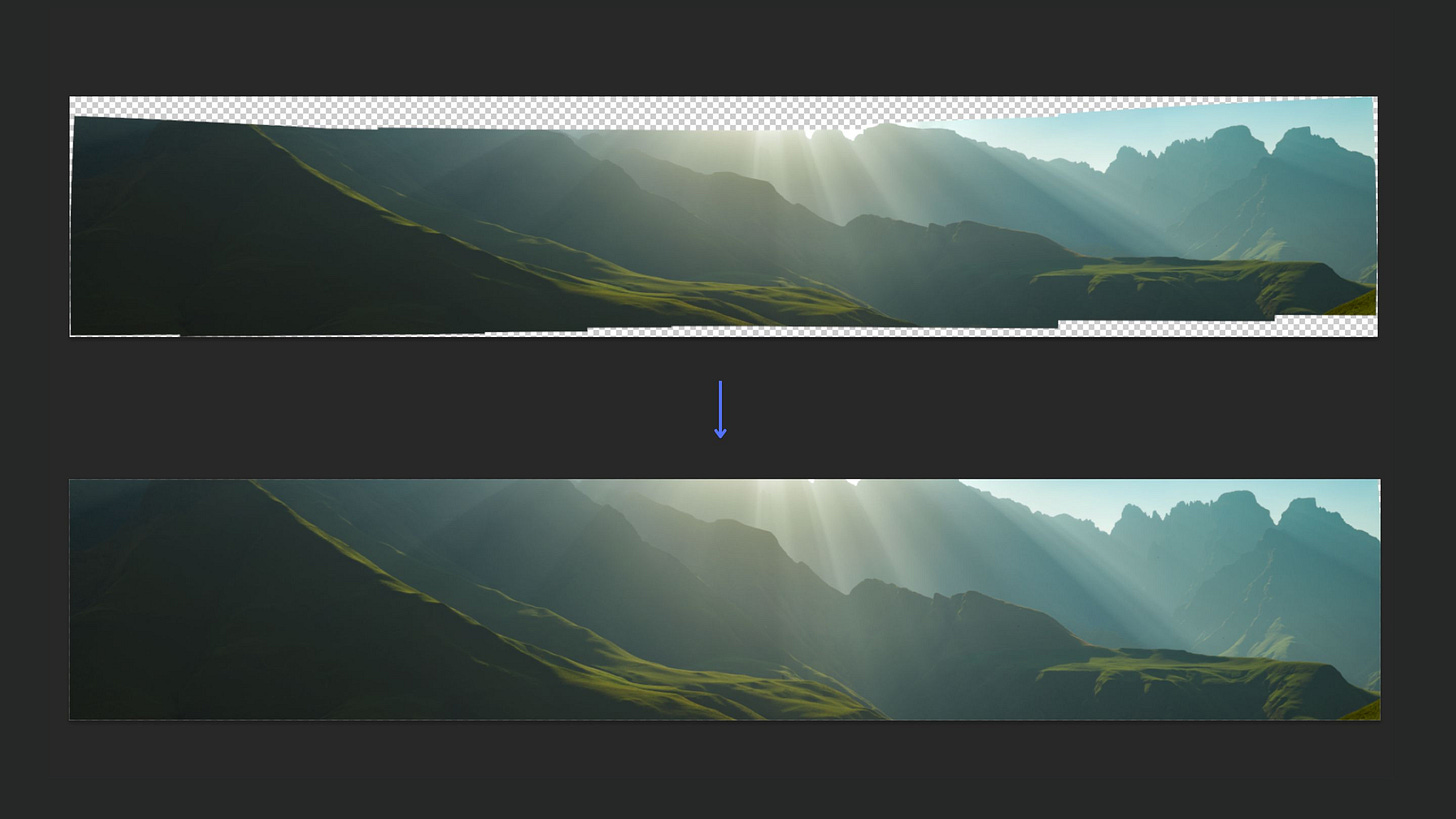
So, I opened the image in Photoshop (image below, right click on panorama > Edit in > Adobe Photoshop), where there are a few more cropping / transform options.
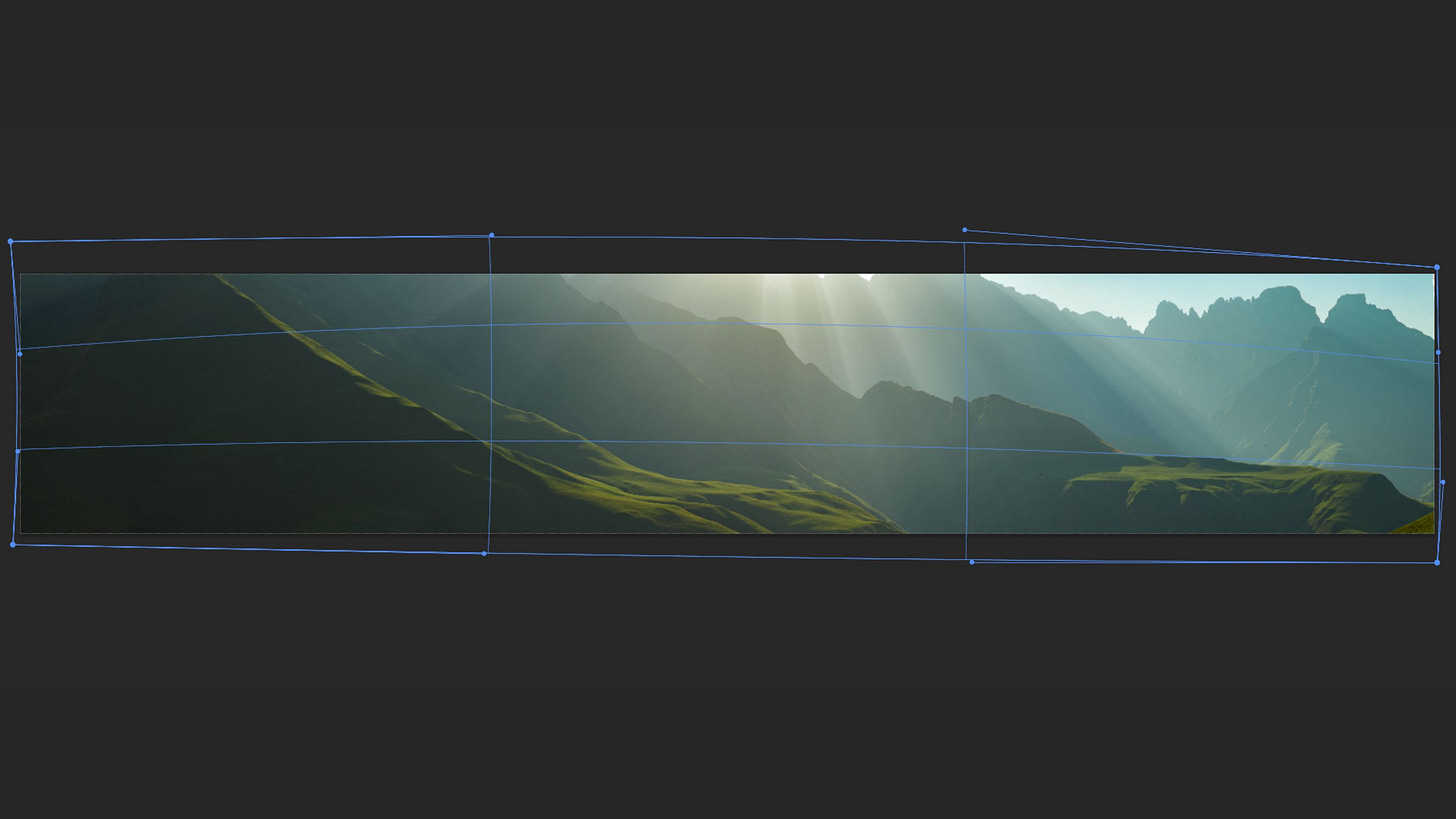
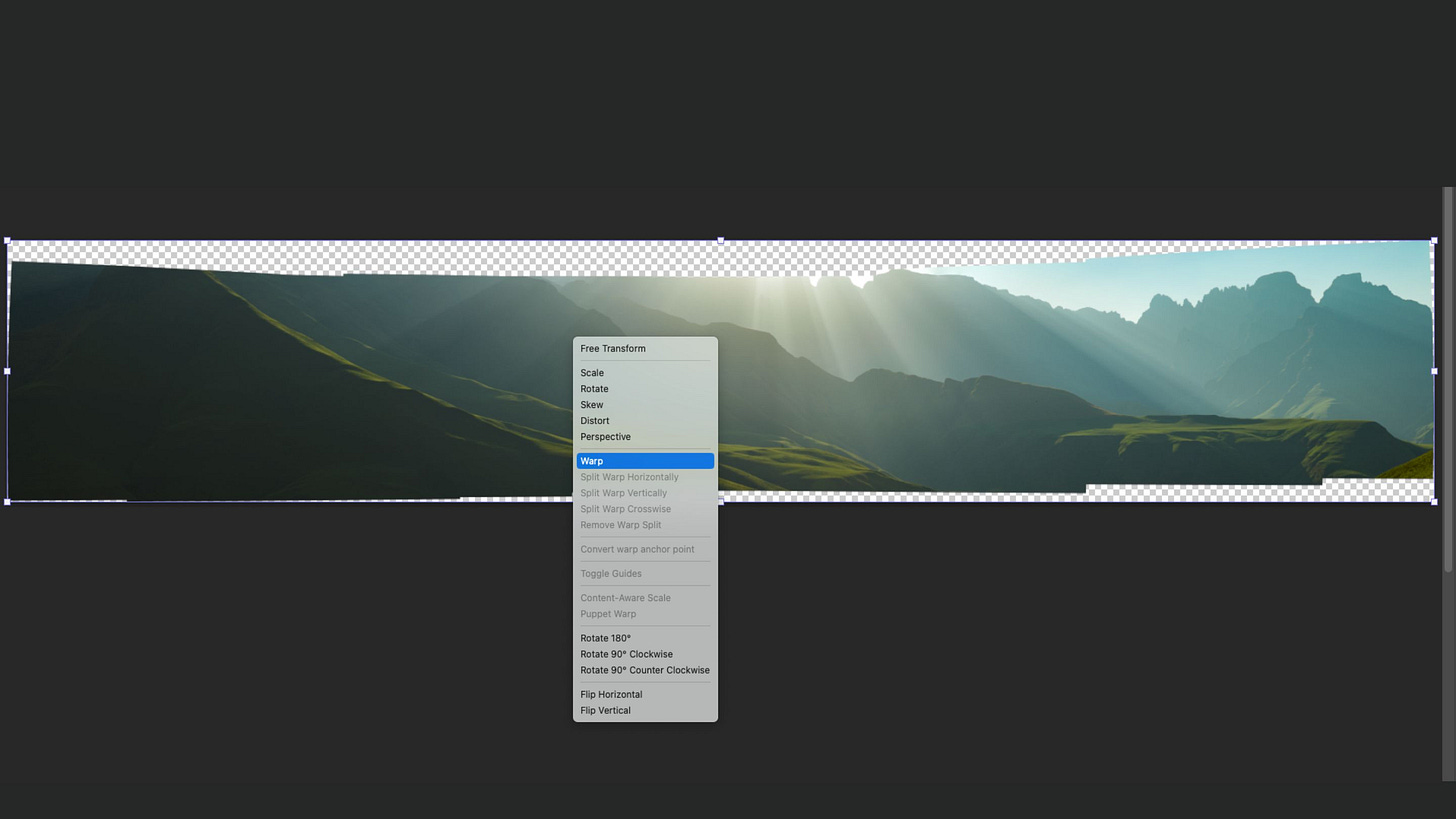
Once open in Photoshop, I hit Command + T (Control + T on PC) or go to Edit > Free Transform, then right click on image > Warp (see below).
This gives me the freedom to manipulate the image in a more localised way.
I just click on the area I’d like, then drag up / down / left / right (see below, as well as video at the end).
This way, I could stretch out certain parts of the image (within reason) to fill out the canvas, without the need to crop in.
And I could leave the mountain peaks top right in place (see below, as well as video at end of post).
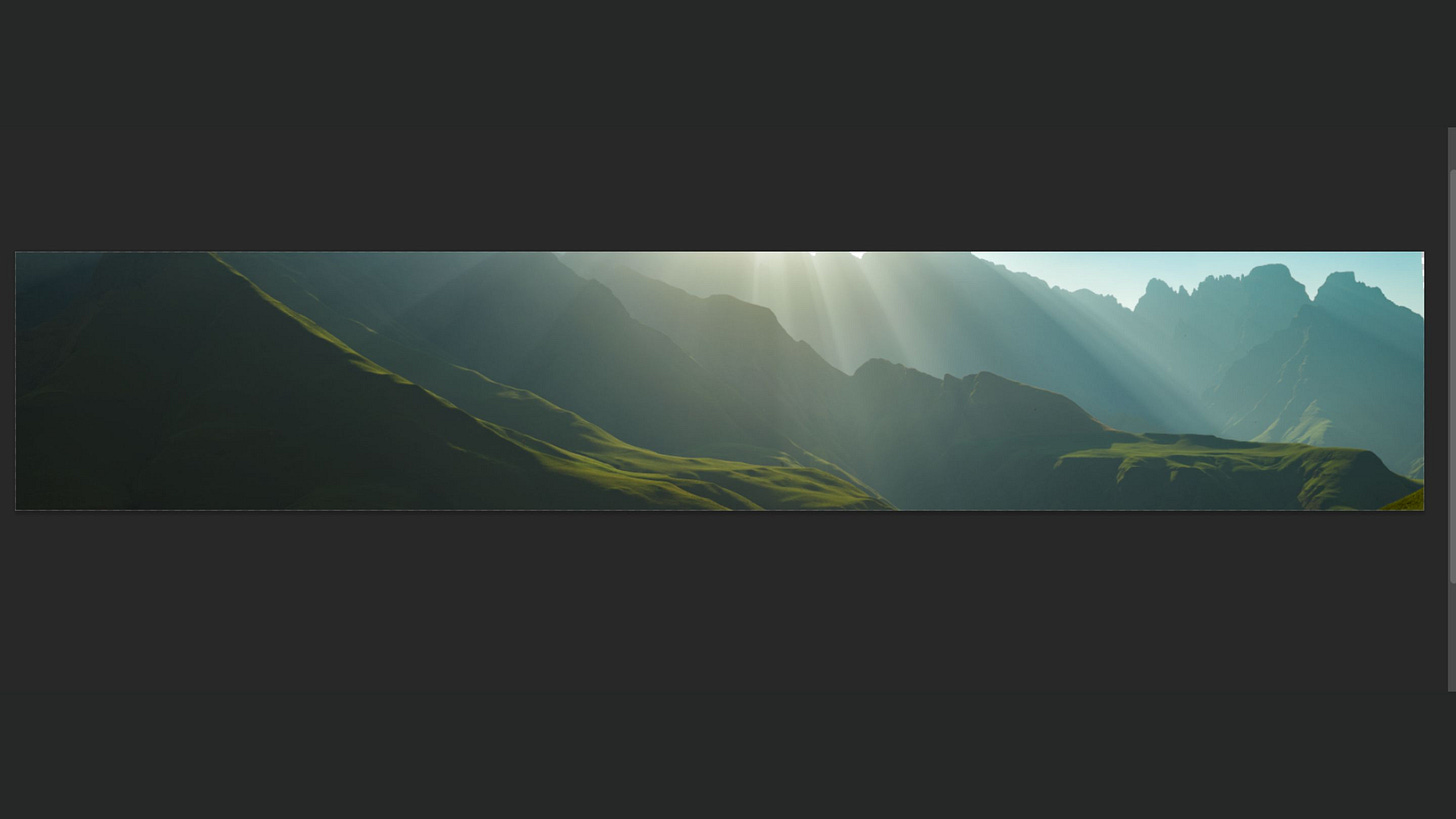
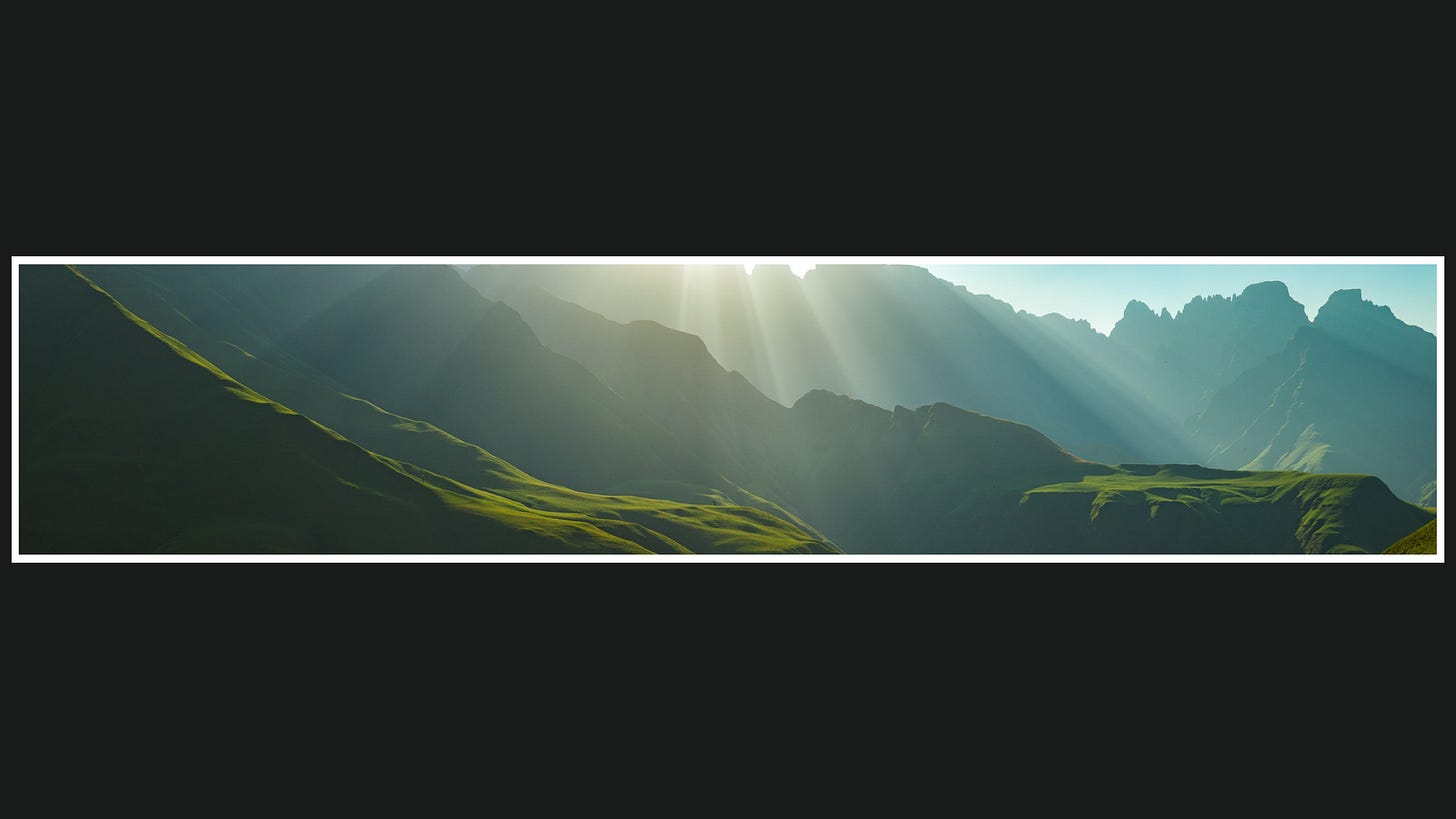
Below is the final image in Photoshop, only some final colour adjustments to be made.
So, I went from an unusable panorama, to one that retains the essential elements that make the image work (in my opinion).
Of course, the best thing to do, would be to capture enough frames when out in the field in the first place.
The technique I used here is for those rare cases that I couldn’t.
Or thought I did, but didn’t.
In other words, it’s a rescue technique (“Save the Pano”!).
After some colour adjustments, the resulting panoramic image came out quite nice (above).
If you’d like, I made a quick 1min30sec overview of the whole process in the screen recording below 👇🏽.
That’s it for this week, I hope you found it useful (or at least a bit interesting)!
Do you ever need to save your panoramic images after not capturing enough frames when out in the field?
Or maybe it’s just me?!
Simply hit reply and let me know / comment below.
PS - Next week (and over the next few weeks), if you’d like to come along on the journey, we’ll head out on the 8 Day Namib Naukluft Hiking Trail, one of the toughest in the Southern Hemisphere - stay tuned!
—
Until next time ✌🏽.
Cornelius
Last week’s blog / newsletter:
Enjoy this newsletter?
Forward it to a friend 👉🏽 sharing is caring 😊.
Join the Crew?
If you’d like to keep sharing the visual stoke together, sign up for Alpine Dispatches.
Looking for more / to connect?
You can find me on Vero (photography), Instagram (photography, life, family) and Twitter (photography, discussions, thoughts), as well as my website (portfolio, trying to be an adult 🤷🏼♂️).



Love your final product!!
The photographs taken in the field and the techniques used in Lightroom and Photoshop actually ended up making a rather captivating image. I like how it turned out!